Embroidery Digitizing
To put it simply, embroidery digitizing is the process of converting artwork into a digital file using a software that allows embroidery machines to understand the needle’s path. This process is not automated and in fact, great digitizing is considered an artform if done correctly. Most embroidery machines have software of their own allowing us to control their functions while reading instructions from a file that has been digitized.

Embroidery machines are not able to read the same types of files as your computer can, so you have to digitize your logo in a way that the machines can understand before they can do their job. From a digitizer’s perspective, that usually means taking a JPG or PNG file of a customer’s company logo or artwork and converting into an embroidery file. The embroidery file type is determined by the type of embroidery machine you will be using.
The Basic Steps of Digitizing
1: Upload Your Logo to the Digitizing Software…
2: Set Embroidery Design Size…
3: Choose Your Stitch Type…
4: Set Stitch Direction…
5: Set Your Embroidery Thread Colors…
6: Transfer the File to Your Embroidery Machine...
2: Set Embroidery Design Size…
3: Choose Your Stitch Type…
4: Set Stitch Direction…
5: Set Your Embroidery Thread Colors…
6: Transfer the File to Your Embroidery Machine...
Understanding the design is one of the most important pieces of this process. The size, complexity and placement of the artwork will all factor into the digitizing process. Efficient digitizers (and technically all digitizers if they are good) should consider fabric vs thread. There may be specific designs that will look better to have the fabric show through as a color rather than laying thread down. It’s also important to assign embroidery stitch types to specific areas while considering factors such as the fabric type and “push and pull” of the garment. There are many variables and directions that can affect the outcome of your stitching, so each job should be treated differently and handled with care.
Preparing Your Artwork for Digitizing
Next the digitizer must analyze the artwork to see if it should be edited for embroidery. The final size of the design must be considered. Not all logos that were designed for a print media such as a business card will work well for embroidery. Many designs need to be modified or simplified. Sometimes only the design name and a small image are used. Some elements such as outlining may need to be eliminated and small text may be enlarged and rearranged.
Choosing Your Stich Type
There are a variety of different stitch types that are used to accomplish different looks, textures, and more. Each stitch type has a maximum stitch length that must be taken into consideration. You should also consider fabric type
and the “push and pull” of the garment when selecting your stitch types. Here are the 3 most common machine embroidery stitch types.
Straight Stich
The straight stitch is a foundational stitch for embroidery in which straight lines of stitches are repeated to make a pattern. You can create thick lines by repeating a straight stitch many times. It’s important to note that straight stitches are not just for straight lines, they can be used for curved shapes too! Straight Stitches are most commonly used for…
•Shading
•Outlining
•Detail work
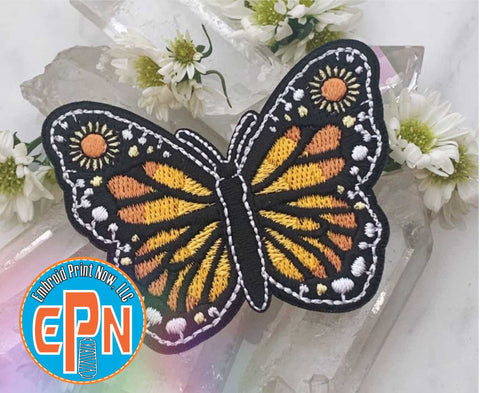
Sating Stitch
If you’re looking to have text embroidered, then the satin stitch is probably the stitch type for you. The longer thread length of satin stitching gives it a shiny look that works perfectly for lettering. The maximum stitch length for satin stitches is 12.1mm. Satin Stitches are most commonly used for…
•Words and text
•Borders
•Achieving a shiny look
•Words and text
•Borders
•Achieving a shiny look
Fill Stitch
Also known as the tatami stitch or the ceding stitch, the fill stitch is typically used to fill in patterns, just like its name suggests. Fill stitches use alternating lines to give the embroidery a woven appearance. The maximum stitch length for fill stitches is 4mm. Fill Stitches are most commonly used for…
•Filling in blank space
•Creating a textured look
•Larger designs
•More durable applications
•Filling in blank space
•Creating a textured look
•Larger designs
•More durable applications
Push & Pull
Another important aspect of embroidery is the “push and pull”. A design may move while being embroidered. This will cause some stitches to shrift. This shifting can occur when using bulky fabrics, long stitches, large areas of thread and a tight bobbin thread. A digitizer must account for the possible effects of push and pull.
The Embroidery Sew Out
Although many left chest business logos are fairly easy to digitize for the experienced digitizer, designs with fine detail, small text, color gradations and lots of color changes require more set-up time. Digitizing is a careful process that requires time and experience to be performed correctly. The digitizer must know how the stitches he sees in his embroidery software will embroider on different fabrics. A well digitized design will enhance your logo so look for an embroiderer who provides quality digitizing.
Recap
There should be no shortcuts with this process and with the number of companies that offer digitizing these days, it’s important to find the right person or business for the job. at Embroid Print Now, we have several digitizers that we use based on experience and reputation.